Its all about water charges in the News these days and with 3 days of no rain, water is becoming a treasured commodity. Storing water is a great and simple way of keeping your garden plants and lawns in top condition without incurring any additional water charges.
There is a strong argument as to why the water charges should not be introduced, but while everyone else is arguing why don’t we get out and get ready for the inevitability coming down the road. Installing water butts is simple and quick. In this article we give you step by step guide on how to install your own water butt at home
-

- water butt range
-

- Cutting Downpipe
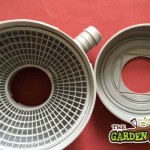
-

- First Cutting Line
First, choosing the right water butt for you
Size is dependent on usage and water butts range in volume from 100l up to 400l, anything larger and you would need storage tanks or underground storage. The most popular size is the 220L water butt. This, when full would have enough water to irrigate a medium size vegetable patch during the summer. Note: on average a vegetable patch requires 25mm of water per M2 per week. We average about 15mm per week, therefore an additional 10mm per week is required. This equates to 10 Litres per M2 per week.
Location:
Water butts need to be positioned next to a down pipe. And the size of the roof above will determine the amount of water harvested. If we get 10mm of rain in one week in summer, a 50m2 roof wil collect 500 litres of water. This is enough to fill your tank over twice per week
Type of down pipe:
There are 2 common types of downpipe: Square downpipes (sizes range from 75 x 75cm to 150 x 150cm), which are becoming more popular with builders, and round down pipes (dia range from 65 to 100cm). Most water butts include divertors that work on both square and round down pipes
-
- Inside Rain Diverter
-

- Installing Diverter
-

- Hole for Waterbutt
Installation:
- You will need some tools including a hacksaw, file, spirit level, pencil, measuring tape & Stanley blade.
- Position the stand & butt close to the downpipe
- Mark the first cut line on your down pipe; level with the top of the water butt inlet
- Note the size of your diverter. The diverter needs to slot into the down pipe
- Knowing the size of your diverter, mark a second cut line on your downpipe. The distance between both cut lines should be provided with your water butt instructions
- Using a saw or hacksaw cut the downpipe along the cut lines removing the small section of pipe. Next file around the edge of the cut to give a smooth and even finish
- Turn your attention to the top or lid of the diverter. This must be cut to size to fit neatly around your down pipe. Measure the width or diameter of your downpipe. Using a stanley blade you can cut the lid to size. Generally the lid itself will have markings and measurements to assist you cutting.
- Once cut, push the lid over the top section of the downpipe and then bring the bottom half of the diverter down over the lower section of downpipe. Then join the diverter together.
- Fit the connecting pipe to the divertor and into the water butt. In some cases you may need to drill a circular hole into the water butt to fit the connection pipe. Once connected your roof, downpipe, divetor and waterbutt will all be connected. Now you only have to wait for the rain for your water butt to start being harvesting water.